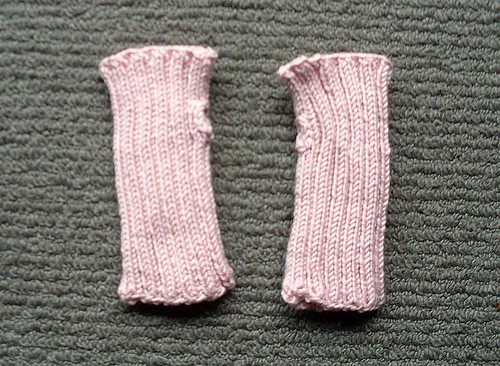
So first off here are some little, toddler-sized fingerless mitts. When I say toddler-sized, they're actually really stretchy, and will fit a much bigger child. I had my (small) 6-year-old try them on to see what they looked like and they fit fine, perhaps could have been a little longer at the finger end, so they'll fit from about 1 to 4 or 5 years old nicely. I've done them using magic loop, but they could easily be done on dpns if that's your thing. These are a super-quick knit, I did them over a couple of evenings in front of the tv.
As always, feel free to do whatever you like with the mitts you make from my pattern, but please credit me by linking to this for the actual pattern. If something is unclear, let me know and I'll try to clarify it for you.
ToddlerMitts
You will need:
3mm circular needles
Approximately 20-25gm fingering weight yarn
Tapestry needle for sewing in ends
2.5mm crochet hook (to slip stitch around the thumb holes, this step is entirely optional)
Using the long-tail method, cast on 44sts over both needles. (I always cast on this way for cuffs or anything that needs to be stretchy, it's loose without being sloppy). Divide the sts between both needles; 22 sts on each. When you've got them all lined up, join for knitting in the round. I've designed these to have 4 knit sts on each side, so on each needle you'll begin and end with K2.
Rib pattern:
Needle 1: K2, P2 to last 2 sts, K2.
Repeat for needle 2.
I've done a nice long cuff on these to keep little wrists warm, so if you want to do the same, rib as per pattern for 3 inches.
Thumb hole:
For the next 6 rows you'll be knitting backwards and forwards across the rows, not in the round. Continue in the established rib pattern, and slip the first stitch of each row.
On the next row, you'll rejoin at the end of the row to return to knitting in the round. I've ribbed for another inch which will be quite long over little fingers to keep them warm, if you don't want to do that much, it's entirely up to you.
Cast off very loosely in rib pattern.
If you want to slip stitch around the thumb holes, do so loosely. I only did about 7 or 8 sts around each, just for aesthetic reasons.
Work in loose ends, and make another one!


No comments:
Post a Comment