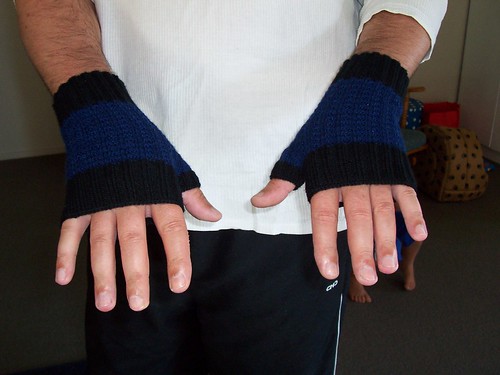
Here's another freebie for you, this time fingerless mitts for men. These were made for my bf's Dad, who belongs to a gun club and enjoys his target shooting. I thought they might help to keep his hands warm in winter without impeding his aim. As always, use the pattern for whatever/whoever you like, but please credit me by linking back to my blog for the pattern. And if you find any errors or something isn't clear, let me know and I'll endeavour to fix it.
Target
You will need:
Approximately 60gms of fingering weight yarn. I used Haven by Naturally in black and Patonyle sock yarn in navy. You don't need 2 colours, they'd look just fine all in one colour.
If you're using 2 colours, I've called the cuff colour "colour A" throughout, and the hand colour "colour B"
2 small safety pins to use as stitch holders
2.5mm circular needles
A stitch marker or 2 if you feel more comfortable using them during the increases.
The pattern:
With Colour A, CO 68 sts. Join for working in the round, being careful not to twist stitches. You should have 34 sts on each needle.
K2, p2 rib for 2 inches, break colour A and join in Colour B.
Pattern rounds –
Rnds 1 & 2: K all sts
Rnds 3 & 4: K2, P2 around.
Continue working these 4 pattern rounds until you have worked a further 2 inches.
Thumb gusset –
Into the first st of the next round, kfb. Continue the round in pattern.
At the beginning of the next round, kfb, kfb, continue the round in pattern.
Next round – kfb, k1, kfb, continue the round in pattern.
Next round - kfb, k3, kfb, continue the round in pattern.
Continue increasing on each round until you have 29 extra sts at the beginning of the round. On the next round, work those sts and place them onto 2 safety pins; 15 on the first and 14 on the second. Forget about those sts for now, and continue with the remaining sts (you should still have 34 on each needle) in pattern for a further 8 rounds.
Finger cuff –
Break Colour B and rejoin Colour A. Work k2, p2 rib for another 2 inches (more or less, depending on the recipient’s taste in length), and cast off knitwise.
Thumb cuff –
Put the stitches from the safety pins back onto your needles. Pick up an extra 3 sts from between the thumb gusset and the main body of the mitt (this will help to close up any gaps) and knit 1 round with Colour A. K2, p2 rib for 7 more rounds, then cast off knitwise.
Do it all over again.
Work in ends, and wear with pride.
Work in ends, and wear with pride.
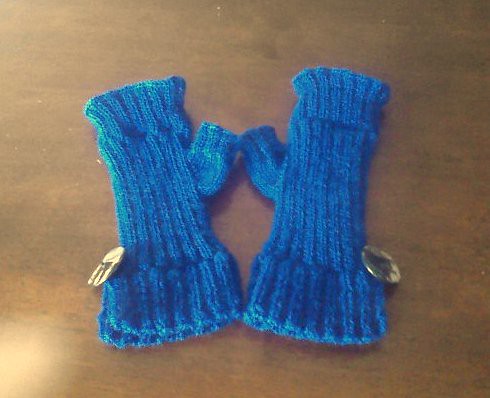 More hideous cellphone camera pics. And they look so much better on than sitting on the table! They do look very small when they're not on, but I've even made The Man try them on and they seem to stretch forever.
